All posts by The Student

Pull-Apart Skillet Biscuit!

Hello!

As may recall from the previous post, I just recently got a new miniature cast-iron skillet.

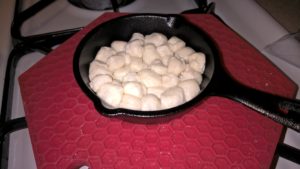
And tonight, I made a pull-apart biscuit, using premade buttermilk biscuit dough.

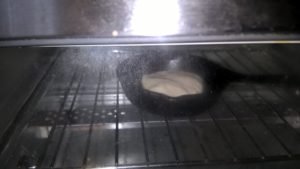
Cut into small pieces. Put into skillet. Bake according to directions.

The caption basically has all the directions… I used some form of pre-made dough, took an individual biscuit’s worth, made mini dough-balls from the single biscuit serving, placed int the skillet, and then baked it in the toaster-oven. (Note: I needed to go up a few degrees and cook for a while longer than indicated on the packaging. I’m guessing this is primarily due to the toaster oven itself. But, yeah. Be aware of that.)

The end result was quite good.

Pull apart. Eat. Enjoy. :)
Pull apart. Eat. Enjoy. 🙂

Enjoy!

I GOT A CAST-IRON SKILLET!!!

HI!!!

So, I’m not actually posting a recipe today. But, I (finally) ended up getting a cast-iron skillet, and I’m ridiculously pleased with it.

In large part, because it’s tiny!

I got a 3.5″ skillet. It was $5 from Amazon, it fits in the toaster oven, and it’s a good way to become accustomed to caring for cast-iron. (Speaking of which, I just made another biscuit and therefore need to finish re-seasoning the thing…)

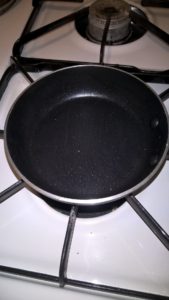
Skillet that's barely not too small for a stove-top
Look! It fits! It’s NOT too small!
Small skillet with an individual size bread.
It fits a mini-bread-biscuit-thing

Anyway. Have a lovely day!

Water Deluxe with a variation

Hello!

Today’s recipe is an excellent summer recipe. Possibly even comparable to the double-coolmint chocolates. It requires a few more ingredients, but it takes a bit less time. So, yeah. This is an excellent Summer drink:

Water Deluxe

Ingredients / Required Serving Implements

  1. 1 Cup of desired size
  2. Lemon Juice
  3. Ice (optional. I generally haven’t used this, but it should work.)
  4. Straw (semi-optional)

Instructions

  1. Put ice and water into the cup
  2. Pour an appropriate squirt of lemon juice into the cup, according to taste preference. Just enough to make it slightly tangy works.
  3. Stir around (Why the straw is only semi-optional. A spoon would also work)
  4. Let sit for a few minutes to let flavors combine
  5. Enjoy (non-optional).

Variation 1

  1. In addition to the lemon juice, cut or shred a small amount of ginger.
  2. Place the ginger into the cup of the original recipe Water Deluxe.
  3. Stir
  4. Enjoy

What Happens When You Overfill a Crockpot with 5(ish) Ingredients

Do you have any idea how hard it is to start off a post? Normally, I just start with “Hi!” or “Hello!” But that seems so bland. And I shouldn’t be bland for a cooking blog, right?

Whatever.

Anyway, hello! Or something.

A couple days ago, I made a variation on my usual Chicken Soup. This time, I made it in the slowcooker. And with a bit too much of (almost) everything. It is excellent!

And it only need 5(ish) ingredients.

Recipe

  1. Chicken. I used a package of drumsticks, and a package of thighs. So, call it about 15-20 pieces of chicken. This was more than my poor slow-cooker crock-pot could hold. Oh well. It was quite tasty! And I have a lot of leftovers! Some of it didn’t get completely submerged, so it turned into roasted chicken rather than boiled. (Not too much, though.)
  2. Onion. I’m guessing I used about a pound. It probably would have been about 1.5 regular sweet onions. However, the place I went to buy food is awesome, and I got about 3 pounds of onion in 2 onions. So, I used about 3/4 of one onion. Hence, guesstimating about a pound.
  3. 1 Tablespoon of salt
  4. 4 cups of water.
  5. Carrots. (About 1/2-1/3 of a pack of baby carrots…?)
  6. Optional: A sprinkling of lemon juice.

Directions

  1. Lay the onions on the bottom of the crock pot.
  2. Remove as much of the skin as reasonable from your chicken. This helps make your soup not too greasy. It may also help you stack more in vertically…
  3. Pour on the salt
  4. Pour in as much of the water as you can. Be sure to hit the salt, so that the seasoning will be absorbed in all the soup.
  5. Wedge the carrots on top. If you can get them into the liquid, that will help flavor the soup. So, try for that insofar as possible.
  6. Cover, and cook on low for about 10-12 hours. (This gives you a really rich, excellent broth!)
  7. Enjoy. (And maybe freeze some of your leftovers so that they don’t go bad in your refrigerator. Depending on how many people you’re feeding with the soup.)
Overfilled crockpot of chicken soup
THIS is what to much of 5 ingredients looks like. 🙂
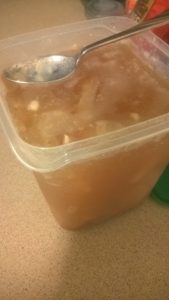
Very thick chilled chicken broth.
You can tell it’s good, because it gels QUITE nicely.

Coffee Mod: Cinnamon

Hi!

So. I don’t know about you, but I’m a big fan of certain types of coffees. Including some flavored coffees. One of my recent favorites is a non-sweet “cinnamon-roll” type of coffee.

And so I decided to try to make my own variation. It turned out pretty well!

Basically, I’ve been putting about a 1/4 tsp of Cinnamon into an individual-brew cup. (I have some of those reusable k-cup pod thingies.) And then I’ve been brewing the coffee. And voila! It tastes like cinnamon coffee.

You should try it!

Have a great evening!

Roast Chicken Drumsticks

Hi!

Tonight, I once more made a dinner with chicken drumsticks. (They’re still inexpensive.)

For the recipe tonight, instead of making soup, I roasted them with a bit of seasoned butter. They turned out quite nicely.

Ingredients

  1. Chicken drumsticks (Skin on)
  2. 2-3 Tbsp Butter (I used salted this time, and therefore did not include more salt in the recipe)
  3. 2-3 cloves of garlic (minced) (1 clove per Tbsp of butter)
  4. 1 tbsp(ish) lemon juice
  5. Large pinch of Basil
  6. Larger sprinkle of Parsley
  7. 2 Shakes of paprika (separated)

Directions

  1. Preheat oven to about 425 f.
  2. Soften butter
  3. Mix butter with the garlic, lemon juice, and herbs
  4. Rinse chicken, pat dry, place in a baking pan.
  5. Put seasoned butter underneath the skin of the chicken, and on top
  6. Sprinkle the chicken with more lemon juice and a touch more paprika
  7. Bake until chicken is thoroughly prepared (juices run clear, internal temperature appropriate, etc. For me, I cooked it for about an hour. That may have been overkill. But it worked.)
  8. Enjoy! I also cooked up some rotini to go with.

I accidentally made savoury Jello, and it’s good.

Hello!

So, the other day, I decided to make chicken soup. It turned out nicely. It turned out so nicely, in fact, that it turned to jello when I refrigerated it. (That’s apparently one of the signs of a really well-done chicken stock. It has something to do with getting all the flavor from the chicken bones, and chicken bones being a common basis for gelatin and stuff.)

But, yeah. It made a good soup. And it can be reheated from its jello form into soup. So, here’s the recipe.

Chicken Soup / pre-Savoury-Jello

Ingredients

  1. 3-4 pounds of drumsticks. These should be really inexpensive. (I paid about $0.69  a pound.) I actually initially made the soup because I wanted the drumsticks. The fact that the soup turned out so well was an added bonus! This ended up being about 12-14 drumsticks. (I’m not entirely sure. I miscounted a few times. And it doesn’t really matter…) Price (rounded): $3
  2. 1 medium sweet onion, sliced. Call it about $1.
  3. Carrots. (I used about a third-bag of baby carrots, since I eat those for snacks anyway, and didn’t want to deal with peeling and chopping and stuff.) Call it about $0.50
  4. Salt to taste
  5. Water.
  6. (Optional: some lemon juice, other seasonings.)

Instructions

First some pre-instructions.

  1. Remove the skin from some of the drumsticks. (Semi-optional. This makes it a bit easier for the skimming later on.)
  2. Slice the onions.

In whatever size pot you have that will hold your ingredients and let you fill it with water so that it won’t boil over…

  1. Place the drumsticks in the pot.
  2. Cover with water. (Make sure the drumsticks are all covered.)
  3. Put in onions, carrots, and salt.
  4. Bring to a rolling boil, stirring occasionally.
  5. Skim the surface as you go. (Lots of stuff from the skin and stuff will come up to the top. It increases the chance of boil-overs.) Be careful to leave the onions and carrots in.
  6. Let it continue to boil until the chicken is fully cooked. Yes, some recipes call for it to simmer. It probably turns out better. I don’t know. But this is what I’ve done, and it still tastes good. And it gets done in generally between 20 and 40 minutes. You’ll know it’s either done, or close to being done, when the meat starts falling off the bones.
  7. If you’re like me, let it continue to boil for another 3-5 minutes, just to be extra sure.
  8. Remove the chicken from the pot, for easier access to the broth.
  9. Skim the fat and stuff. (Or wait to do that the next day after it’s refrigerated, and have a really rich soup that night. My default. Especially as I do skim some of the stuff with a large spoon as I go.)
  10. Serve it up, and enjoy. Depending on how much water you use, you should get at least 4 meals out of it. And lots of snacks with the drumsticks.
A pile of chicken drumsticks.
This is (part of) what $3 can get you. 🙂

Blue-Pineapple Stuffed Chicken

Hello!

Today’s main dish was pretty excellent, if a bit different from what I usually do. And it’s also probably a bit more expensive than you’d normally want. But I am surprised by how much I liked it.

I made a Blue cheese & Pineapple Stuffed Chicken Breast for dinner.

Ingredients

I made a single (boneless, skinless) breast worth. You can (probably) adapt this fairly easily.

  1. A boneless, skinless chicken breast. I used a fairly large one.
  2. About 1/4 cup Pineapple. (I used canned.)
  3. About 1/8 cup blue cheese crumbles. (I did not measure this.)
  4. About 1/8 cup bread crumbs, plus more for sprinkling.
  5. Herbs & spices. (I used parsley, basil, paprika, and salt.)

Directions

  1. Preheat oven to about 400 F.
  2. Line an appropriately sized baking dish with aluminum foil to minimize cleanup. Put a touch of oil and some seasonings onto the bottom. (Optional.)
  3. Slice the chicken (not all the way through) so that you can stuff it. (You want to have a cavity you can fill.)
  4. Mix together pineapple, blue cheese, herbs and spices, and bread crumbs in a small bowl. The consistency should not be too liquidy. If it is, add more bread crumbs. Or blue cheese. Or both. 🙂
  5. Stuff the stuffing into the chicken. (You may want to put the chicken in the baking dish before stuffing. Up to you.)
  6. Sprinkle the chicken with herbs and more breadcrumbs. (This gives the chicken a bit of extra flavor and crunch.)
  7. Bake until chicken is thoroughly cooked.
  8. Take a picture.  (Optional.)

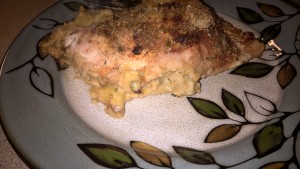
    Blue cheese slightly breaded chicken
    Dinner. Yum. 🙂
  9. Enjoy

Easy Vegetable-Bean Soup

Hello!

Sorry it’s been a while. I’ve been grad-student-ing, and I haven’t had time to really keep track of stuff or discover new recipes or things like that and write them down. But I did discover / make a tasty soup the other day. I’m not entirely sure how much it cost, but I’m sharing the basic recipe.

The broth

This is something that can be used for basically any soup variation you can think of. I use the Chicken Better than Bullion stuff. I made about 6 cups of broth, so 2 heaping tablespoons of the Chicken Stuff, and six cups of water, on the stove. (I used the heaping measures, since I knew I was adding liquidyish stuff to the broth that would dilute the original.)

To that, I added about a can of tomato paste. (What can I say? I really like tomato!) An alternative is a can of stewed tomatoes. Or you could do both.

Note: I added a bit of salt to this broth. That’s in part because I really like salt, and because I was using the low-sodium Chicken Stuff.

Boil this in a soup pot. Or start to heat it and add the other stuff while it’s heating.

The seasonings and “stuff”

Seasoning: What I did the other day was I added parsley, basil, and some ground clove. It worked well.

Stuff:

  • Vegetables
  • 1 C Rice
  • 1 can of beans (Drained, rinsed. I used black beans.)

For vegetables, I used what I had on hand. I think that included an onion, a zucchini, a couple large sticks of celery, and a few handfuls of baby carrots. This is super flexible, though. And be aware that your onions will probably end up really mushy if you boil them for a while and cut them too fine.

After it boiled, I turned the heat down and let it simmer for as long as the rice was supposed to cook, stirring at random intervals. I actually put the rice in early on, and then added the vegetables as I was done chopping them. (Harder veggies, like carrots, went in first. Then the others. Really, though, those are extremely flexible if you don’t mind mushy vegetables.)

“Garnish”

When I had the soup, I just sprinkled some white cheese on top. Ok, so I actually put a handful of shredded mozzarella, a cut-up babybell, and a torn string cheese at the bottom of a bowl, reheated the soup to about boiling, and then spooned the soup over the cheese.

I like cheese.

Other options that would have been great to include would be chicken. Or chicken with cheese. (Given that I used clove, the white cheese worked better than cheddar would have.)

So, yeah. I think that was a generally inexpensive recipe, and it lasted me for a week of lunches. I hope you enjoy!
Double-Coolmint Chocolates (Dessert)

Hello, readers!

I discovered a New Favorite Thing for the summer. I’m calling it “Double-Coolmint Chocolates”.  It is possible one of the easiest recipes I will ever post here.

Ingredients

  1. 1 bag of mint-chocolate candies. (I used M&Ms. I imagine Andes Mints or York Peppermint Patties or anything else would work.)

Directions

  1. Purchase the individual bag(s) of mint-chocolate candies
  2. Put in freezer
  3. Let chill for at least 10-30 minutes, until chilled.
  4. Take out of freezer, serve immediately.
  5. Enjoy.

There you go. Have a great day!